I know I am repeating myself but to explain why this page was made, at the request of friends who like my style of imagery I do not refer to them as photographs any more since with the additions I often add in my opinion they cease to be only photographs more like hybrids. There is an introduction page and I suggest you read it as it will give an insight into how I work.
Most of my photographer friends use Photoshop to alter their images I do not nor do most of my "Photographic Manipulator" friends
I tried Photoshop some time back and realised that I could do the same thing in PaintShop Pro far quicker and easier, well at least 90% of the things
PaintShop Pro is not a subscription based programme (or as
programmes are being referred to now not an App )

So to those who use programmes other than PaintShop Pro you will need to translate what I am saying into what you would do in your own programme
The technical jargon may vary from App to App but the fundamentals are the same Since I am not here to teach you Photoshop but to help you make images in a similar manner to me
Please note that although am showing you how to do this in PaintShop Pro it can be done in most editors from the most modern versions of Photoshop back through their range. I have included a screenshot of Photoshop Elements 9 a programme. stopped using long time ago See bottom of the page. and perhaps I should stress that if you are going to work with LAYERS every layer other than the background needs to be in a format which supports transparent areas, now JPG or JPEG image do not

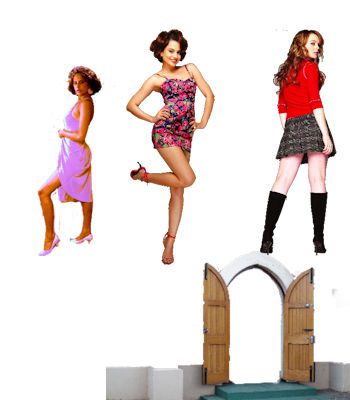
The image above was created using pieces from several of my images and a
couple of 3d clipart additions. the first thing to do is create your
(shall I call them) OBJECTS into .PNG images (PAINTSHOP users call them
TUBES) the reason I am saying use PNG images is that the background will be transparent and it is universally used
in all design programmes so you could use them in Photoshop, PaintShop, Affinity
or any other you choose
Make sure you feather them well you can increase the amount of
feathering when working with larger images.
For those of you
who do not know how to feather. Use the magic wand tool
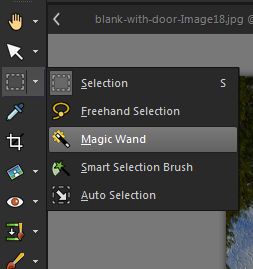
and select all of
the blank space ( the chequered area)
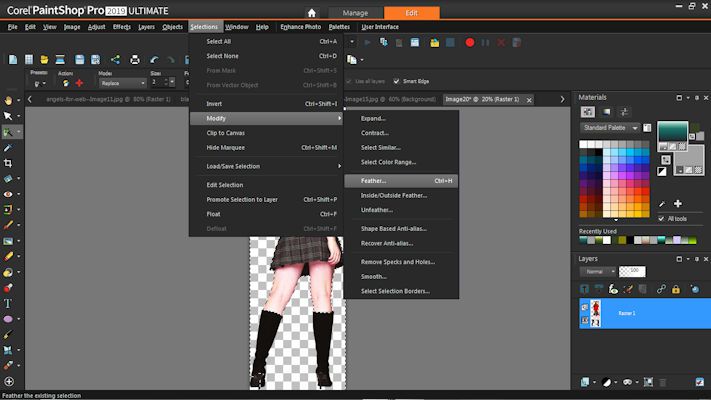
Then SELECTIONS /MODIFY/FEATHER. set the feathering size and hit delete several times. Paying
attention to this process can make a big difference to your final image
When I started out to make this tutorial I only had the three ladies hence this picture, I thought it was unbalanced so I added the forth
When you are sure that your images are well feathered and will fit in Colour wise It is time to start. Something I omitted to mention in the first page was shadows WATCH OUT that if you have shadows on your object the fit. For more on feathering see
You can check your feathering by placing a coloured layer temporarily behind it
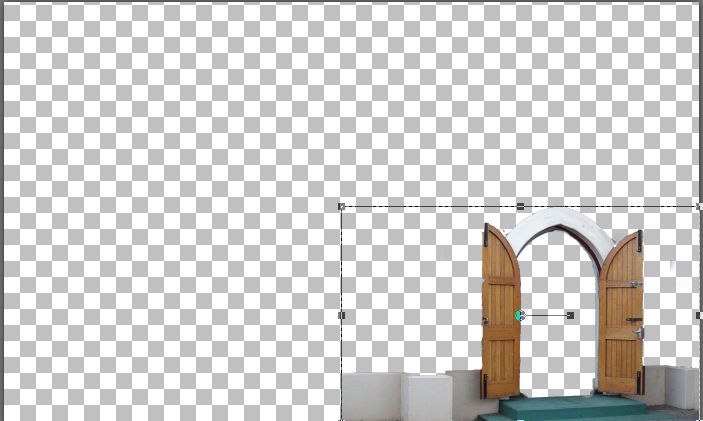
To start with make a blank transparent canvas
larger than what you need and put your first OBJECT onto it as seen
above as a new LAYER
You can stretch or shrink this to suit your requirements I used this
PNG
image of mine extracted from a photograph of a local Church hall that I
previously photographed.
Now you can start adding your other OBJECTS as LAYERS sizing and
positioning them as required See Below.
Click on imge for larger view.
Once you have added all the OBJECTS you want you will possibly
notice that there are no clouds an id we were to save this as a JPEG
file the chequered area would be white. Not what we wanted.
So in the LAYERS PALETTE on the right hand side go down to your very
first Layer make sure it is highlighted and insert your clouds,
sometimes the cloud image we had thought would work just does not look
right so delete that layer and put in one you do like.
Remember you can push, pull or resize this layer until it looks just
right I added a texture effect but that was my preference you
could do whatever you like such as brighten or darken it.
As I said above when I was planning this Tutorial I only intended to use Three young ladies but felt the image was unbalanced so added the third, this will happen to you and the beauty of working with LAYERS and saving your file in a format which preserves them such as a PSPIMAGE file allows you to return to it at any time. You can also copy one of the LAYERS from it and use it in another image like the one below.
_compressed.jpg "girl in doorway by alex cummings")
Okay so you have finished your image and saved it as
a PSPIMAGE file but you want to post it to FACEBOOK what do you do.
If your canvas is full then all you need do is SAVE AS. and save
it as a JEPG file but if it is not then you have two choices use the
CROP TOOL or do as I do use the selection too and draw a rectangle round
the portion you want. COPY MERGED and then PASTE AS NEW IMAGE
resize it to the dimensions you want SAVE IT AS a JPG file with
the name of your choice. Otherwise you would end up with a file like the one below.
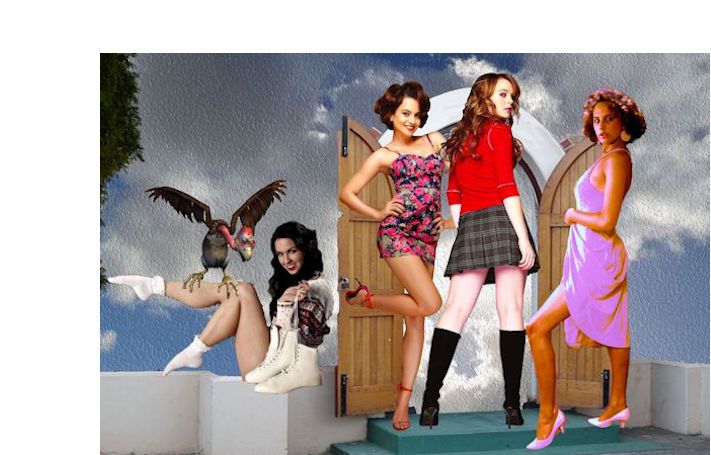
You will possibly notice that the three standing girls are wearing a shade of red this was done deliberately so that none of the stood out from the others too much the girl on the extreme right was photographed wearing a yellow dress but it did not fit so it was changed. also that they are all showing a lot of leg in my opinion a girl in say trousers or ankle leg dress would not have fitted the scene These are the sort of considerations I give when planning my creations
Screen shot from Photoshop elements 9,
It works in a similar fashion. to what I have explained
unfortunately I do have not used it for a long time so I am not prepared
to make a tutorial on that product and as I no longer subscribe to PaintShop on A monthly basis I cannot give you Sceenshots of that.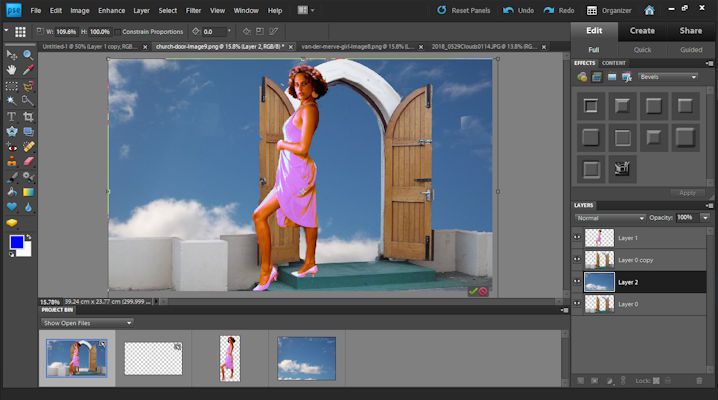
Pages on the site include Home Using Layers Page one Using Layers page 2 How to feather